

How to replace the birdie battery? best Birdie battery (2024). Replacing the “birdie” battery can be a daunting experience, but it’s important for keeping your device operational and hi-tech! Whether you are a tech novice or an experienced user, being able to effectively identify and replace the battery of your device is key.
To begin, you will need to gather the necessary tools and materials. These may include a new battery, a screwdriver, and possibly a pair of tweezers or small pliers for handling smaller components.
We’ll cover identification as well as what type of battery to purchase if more power is needed. We’ll then discuss how to power off and remove the old battery safely in preparation for the installation of the new one.
How to replace the birdie battery? best Birdie battery (2024). Gather the Required Tools and Materials.
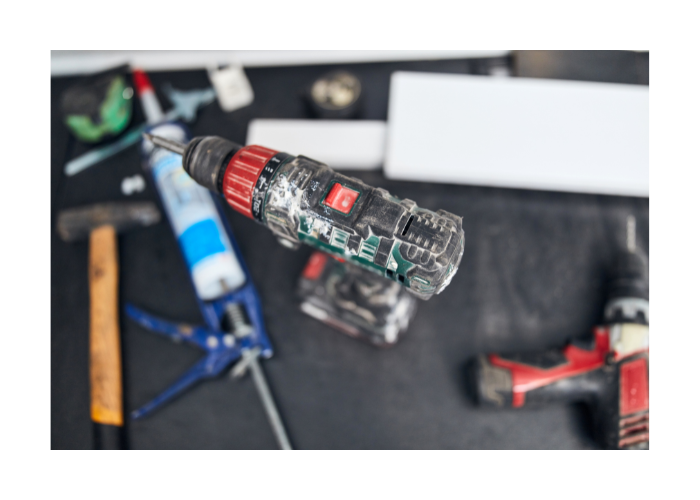
Before starting, ensure you have all the necessary tools and materials at hand. A new battery is essential, specific to your device’s model. A precision screwdriver will help open the device, while a pair of tweezers or small pliers can help manage tiny components. Operating in a clean, well-lit workspace simplifies the process.
Back-Up Your Device Before Replacing the Battery.

Step 1: Back-Up Your Device
Before you begin the process of replacing the battery, it’s crucial to back up all important data. You can do this by connecting your device to a computer or using cloud storage services, ensuring that all your critical information is saved in a safe and accessible place.
Step 2: Power Off Your Device
Once your data is secured, ensure your device is completely powered off. This is essential to prevent any short circuits or electrical damage during the battery replacement process.
Step 3: Open Your Device
Using your precision screwdriver, carefully remove the screws from your device. Note the position of each screw as they may be of different sizes. Once the screws are removed, gently separate the device casing to expose the battery compartment.
Step 4: Remove the Old Battery
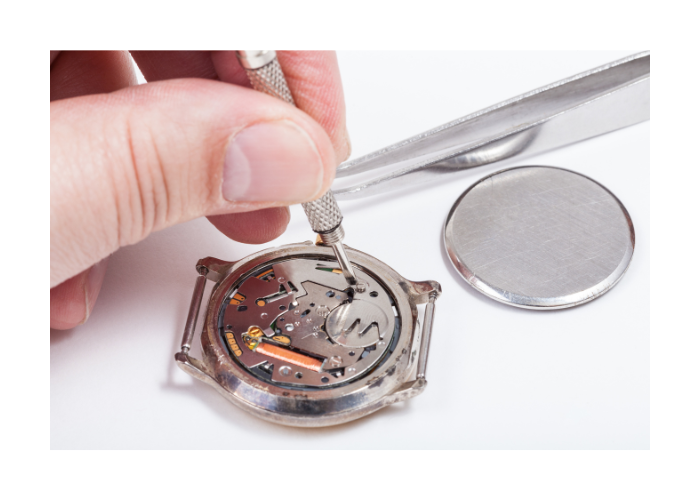
Using tweezers or small pliers, carefully remove the old battery from its slot. Be cautious not to damage any surrounding components. In some cases, the battery may be secured with a small adhesive or clip, which should also be carefully removed.
Step 5: Install the New Battery
Finally, insert the new battery into the empty slot. Make sure it fits securely. Replace any clips or adhesives that held the old battery in place. Reassemble your device by replacing the casing and reinserting the screws. Power on your device to ensure that the new battery is functioning properly.
Carefully Remove the Old Battery.

Removing the old battery requires caution to prevent any damage to the device. You should gently lift the battery from its slot, aided by tweezers or small pliers if needed. In case of any adhesive or clips securing the battery, ensure you carefully disengage them before removal.
Install a New Battery According to Manufacturer’s Instructions
Step 1: Purchase the Correct Battery
Ensure you buy the right battery for your device. Always check the device manufacturer’s instructions or website for guidance on the correct type and size of battery you will need.
Step 2: Unpackage the New Battery
Once you have the correct battery, remove all packaging but be careful not to touch the battery connectors with your bare hands. Use gloves or a cloth to handle the battery, to prevent any accidental damage or discharge.
Step 3: Align the Battery
Before inserting the new battery into the device, ensure its properly aligned. The battery will have positive (+) and negative (-) indicators; these must align with the corresponding symbols in your device’s battery compartment.
Step 4: Insert the New Battery
After aligning the battery, insert it into the empty slot. Make sure it fits securely and that any clips or adhesives that held the old battery are replaced.
Step 5: Check Battery Installation
After the new battery is installed, reassemble your device and switch it on to make sure it is working properly. If the device powers up without any issues, the battery has been installed correctly. If not, recheck the battery installation steps to ensure you haven’t missed anything.
Test Your Device for Proper Functionality After Replacing the Battery.
Step 1: Ensure That Your Device Powers On
After installing the new battery, the first step is to check whether your device powers on. Press the power button and look for any signs of life, such as startup sounds, the welcome screen, or any LED indicators. If your device starts without any hitches, it’s a good sign that the battery replacement was successful.
Step 2: Check Battery Level Indication
Once your device is powered on, it’s time to check the battery level indication. Most devices have a battery icon to show the current battery level. If it shows that the battery is full or near full, then the new battery is performing well.
Step 3: Unplug and Monitor Battery Drain
Try using your device off the charger and monitor the rate at which the battery drains. If your device is holding a charge well and not draining too rapidly during use, it’s another positive indication that the battery replacement was done correctly.
Step 4: Test the Device Performance
Before considering the battery replacement a success, it’s important to test your device’s performance. Use your device as you normally would: browse the internet, use apps, make calls, and so forth.
Step 5: Repeat Charging and Discharging Cycle
Finally, fully charge your device and then use it until it’s completely drained a few times. This process, known as cycling the battery, helps to calibrate the new battery. If your device continues to function well through several charge-discharge cycles, you can consider the battery replacement process a success.
Conclusion
At the end of this guide, you should have successfully replaced your device’s battery and confirmed that it is functioning properly. Remember to always follow the manufacturer’s instructions and take precautions when handling any electronic devices or components. With proper care, your new battery should provide adequate power for your device for a long time to come.
faqs
QNo1: Can you replace a Birdie battery?
A: Yes, you can replace the battery of a Birdie device by following the manufacturer’s instructions or seeking professional help.
QNo2: Does Birdie have lithium batteries?
A: Yes, some Birdie devices may use lithium batteries. It is important to check the device’s specifications and confirm the type of battery needed before replacing it.
QNo3: Does the Birdie come with a battery?
A: Yes, the Birdie device usually comes with a built-in battery that can be charged. However, over time the battery may need to be replaced due to wear and tear. If you are unsure about how to replace your Birdie’s battery, it is best to consult the manufacturer or seek professional help.
QNo4: What is Birdie’s product?
A: Birdie is a brand that offers various electronic devices such as smartphones, tablets, laptops, etc. It’s important to check the specific product model and specifications when replacing the battery.
QNo5: Is Birdie a good device?
A: The quality of Birdie devices may vary depending on the individual product and its features. It is recommended to research and read reviews before purchasing any electronic device, including those from the Birdie brand.
